
Contents |
|
|
|
|
| Predefined figures | |
| A statistical experiment | |
| Game of Life on the Torus | |
| Another statistical experiment | |
| Graphic representation | |
| animation | |
| User input | |
| The help dialog | |
| In conclusion | |
| Download |
To demonstrate this, we will develop a program step by step. A suitable project is Conway's Game of Life, which possesses sufficient complexity and leaves many questions unanswered that can be addressed through simulation. Furthermore, it is visually appealing and offers the opportunity to demonstrate user input. The details of the Game of Life are well explained on Wikipedia .
The programming style we use here is Rapid Development . We will develop individual parts quickly, so that a meaningful and usable program is created immediately. We will then expand this program step by step. If the first approach proves insufficient, we don't hesitate to discard it completely and start again. There's no need to worry about the lost time. Usually, the second approach is created much faster and works much better.
As a first version, we create two Java classes: Test and Situation . The latter contains the actual game situation and the logic for calculating the next lifecycle. The cells are represented by booleans , where true means alive and false means dead.
package rene.life; /** * A situation in Conway's Game of Life. * * Conway's Game of Life is well explained on Wikipedia. */ public class situation { // Size of the game world public int n, m; // The play area and a work area of the same size public boolean[][] field; boolean[][] work; // Number of living fields public int count; /** * Create the play and work area. * * @param n * @param m */ public Situation (int n, int m) { this.n = n; this.m = m; field = new boolean[n][m]; work = new boolean[n][m]; } /** * Fill the area with fields that have a probability density of . * * @param density */ public void fillRandom (double density) { count = 0; for (int i = 0; i < n; i++) for (int j = 0; j < m; j++) { field[i][j] = Math.random() < density; if (field[i][j]) count++; } } /** * Take one step. */ public void run() { for (int i = 0; i < n; i++) for (int j = 0; j < m; j++) { // Counting neighbors: int neighbors = 0; if (i < n - 1) { if (j > 0 && field[i + 1][j - 1]) neighbors++; if (field[i + 1][j]) neighbors++; if (j < m - 1 && field[i + 1][j + 1]) neighbors++; } if (i > 0) { if (j > 0 && field[i - 1][j - 1]) neighbors++; if (field[i - 1][j]) neighbors++; if (j < m - 1 && field[i - 1][j + 1]) neighbors++; } if (j > 0 && field[i][j - 1]) neighbors++; if (j < m - 1 && field[i][j + 1]) neighbors++; // Set a new field according to the rules: if (field[i][j]) work[i][j] = neighbors == 2 || neighbors == 3; else work[i][j] = neighbors == 3; } @Override public String toString() { String s = ""; for (int i = 0; i < n; i++) { for (int j = 0; j < m; j++) s = s + (field[i][j] ? "X" : "-"); s = s + "\n"; } return s; } }
One small detail is that we're not deleting the game area. In Java, arrays are guaranteed to be filled with default values. However, it seems sensible and logical to delete the areas anyway. We'll add that to the code later.
When studying the `run()` function , it becomes apparent that it is surprisingly difficult to avoid an index error . We have used several `if` statements in the code above. Furthermore, the `&&` statement is used to terminate with `false` if the first condition is already false.
There's also a simple trick for this, where the range is extended by one row on all edges. These cells remain inactive, i.e., set to false . Only the inner cells are then used. This solution is also slightly faster. Therefore, we discard our first solution and replace it with the following code. The logic is now much easier to understand.
package rene.life; /** * A situation in Conway's Game of Life. * * Conway's Game of Life is well explained on Wikipedia. */ public class situation { // Size of the game world public int n, m; // The play area and a work area of the same size public boolean[][] field; boolean[][] work; // Number of living fields public int count; /** * Create the play and work area. Delete the play area (not * absolutely necessary). * * @param n * @param m */ public Situation (int n, int m) { this.n = n; this.m = m; // Create a play area with a border of width 1 field = new boolean[n + 2][m + 2]; work = new boolean[n + 2][m + 2]; } /** * Fill the area with fields that have a probability density of . * * @param density */ public void fillRandom (double density) { count = 0; for (int i = 1; i <= n; i++) for (int j = 1; j <= m; j++) { field[i][j] = Math.random() < density; if (field[i][j]) count++; } } /** * Take one step. */ public void run() { for (int i = 1; i <= n; i++) for (int j = 1; j <= m; j++) { // Counting neighbors: int neighbors = 0; if (field[i + 1][j]) neighbors++; if (field[i][j + 1]) neighbors++; if (field[i - 1][j]) neighbors++; if (field[i][j - 1]) neighbors++; if (field[i + 1][j + 1]) neighbors++; if (field[i + 1][j - 1]) neighbors++; if (field[i - 1][j + 1]) neighbors++; if (field[i - 1][j - 1]) neighbors++; // Set a new field according to the rules: if (field[i][j]) work[i][j] = neighbors == 2 || neighbors == 3; else work[i][j] = neighbors == 3; } // Copy workspace back and count the living: count = 0; for (int i = 1; i <= n; i++) for (int j = 1; j <= m; j++) { field[i][j] = work[i][j]; if (field[i][j]) count++; } } @Override public String toString() { String s = ""; for (int i = 1; i <= n; i++) { for (int j = 1; j <= m; j++) s = s + (field[i][j] ? "X" : "-"); s = s + "\n"; } return s; } }
Note that the arrays are now 2 larger. Also, the loops now run from 1 to n (or m) instead of from 0 to n-1 (or m-1).
The `toString()` function overrides the function that each object has. This allows you to conveniently print a situation to the console. The `fillRandom()` function fills the area randomly with a predefined density of live fields.
As a test in the main program, we randomly set a 5x5 field with a density of 0.3 and test the logic in several examples.
package rene.life;

import java.io.File;
import java.io.PrintWriter;

public class Main
{
    public static void main (String args[])
    {
        Situation s = new Situation(5, 5);
        s.fillRandom(0.3);
        System.out.println(s);
        s.run();
        System.out.println(s);
    }
}
A typical example looks like this.
---XX
X--X-
X---X
-XX--
-XXXX


---XX
---X-
X-XX-
X---X
-XX-
There are some interesting figures, which are also mentioned in the Wikipedia article. We want to demonstrate gliders . These are figures that regenerate themselves after a few iterations, albeit slightly offset. To use the gliders, we write a set() function and define static arrays that we can insert into the scope.
The following function is inserted into the situation .
    /**
     * Place a figure at position x,y in the area.
     *
     * @param figure
     * @param x
     * @param y
     */
    public void set (boolean[][] figure, int x, int y)
    {
        for (int i = 0; i < figure.length; i++)
            for (int j = 0; j < figure[i].length; j++)
                field[(x + i) % n][(y + j) % m] = figure[i][j];
    }
In the main program, we define the simple glider and use it. It reproduces itself after 4 iterations.
public class Main
{
    public static void main (String args[])
    {
        Situation s = new Situation(5, 5);
        s.clear();
        s.set(glider, 1, 1);
        System.out.println(s);
        for (int i = 0; i < 4; i++)
        {
            s.run();
            System.out.println(s);
        }
    }

    final static boolean[][] glider =
    {
            { false, true, false },
            { false, false, true },
            { true, true, true }
    };
}
The output shows that our code works. The slider reproduces itself, shifted one field to the lower right.
-X---
--X--
XXX--
-----
-----

-----
XX--
-XX--
-X---
-----

-----
--X--
XX--
-XX--
-----

-----
-X---
--XX-
-XX--
-----

-----
--X--
---X-
-XXX-
-----
For further experiments, it's useful to be able to represent the figures in a simplified way. We do this with strings, which we translate into boolean matrices. This allows us to define the ship, which is also reproduced in 4 iterations.
    public static void main (String args[])
    {
        Situation s = new Situation(7, 12);
        s.clear();
        s.set(translate(ship), 2, 2);
        System.out.println(s);
        for (int i = 0; i < 4; i++)
            s.run();
        System.out.println(s);
    }

   final static String ship[] =
    {
      "-XXXXXX",
      "X-----X",
      "------X",
      "X----X-",
      "--XX---"
    };

    public static boolean[][] translate (String[] figure)
    {
        boolean res[][] = new boolean[figure.length][];
        for (int i = 0; i < res.length; i++)
        {
            res[i] = new boolean[figure[i].length()];
            for (int j = 0; j < res[i].length; j++)
                res[i][j] = figure[i].charAt(j) == 'X';
        }
        return res;
    }
------------
--XXXXXX----
-X-----X----
-------X----
-X----X-----
---XX-------
------------


------------
----XXXXXX--
---X-----X--
---------X--
---X----X---
-----XX-----
------------
To demonstrate the speed of our code, we'll conduct an interesting statistical experiment . We'll run random starting positions with a given density for a certain period of time. It turns out that the density of living units tends to decrease. This raises the question of how many living units, on average, remain after a certain number of steps. To answer this, we need to generate a large number of runs and calculate the mean values.
We write this value to a file that we can read with any program. The format is CSV (comma-separated values) . It has the format "steps, density" per line. CSV can be read by all statistical programs.
public class Main
{
    public static void main (String args[])
    {
        generateDecayStatistics(50, 50, 0.5, 1000, 1000);
    }

    public static void generateDecayStatistics (int n, int m, double fraction,
            (int length, int repetitions)
    {
        double density[] = new double[length];
        for (int i = 0; i < length; i++)
            density[i] = 0.0;

        SituationTorus situation = new SituationTorus(n, m);

        for (int i = 0; i < repetitions; i++)
        {
            situation.fillRandom(fraction);
            density[0] += (double) situation.count / (n * m);
            for (int k = 1; k < length; k++)
            {
                situation.run();
                density[k] += (double) situation.count / (n * m);
            }
        }

        for (int i = 0; i < length; i++)
            density[i] /= repetitions;

        try
        {
            File file = new File(
                    System.getProperty("user.home")
                            + System.getProperty("file.separator")
                            + "densities.dat");
            PrintWriter out = new PrintWriter(file);
            for (int k = 0; k < length; k++)
            {
                out.println(k + ", " + density[k]);
            }
            out.close();

            System.out
                    .println("Densities written to " + file.getAbsolutePath());
        }
        catch (Exception e)
        {
            System.out.println(e);
        }
    }
}
I imported the generated file into Euler Math Toolbox and displayed it graphically. However, Excel could also be used. A typical output looks like this.
Apparently, there is a limit. In the end, the situation usually consists only of 2x2 blocks that are stable or 1x3 blocks that reproduce themselves after two steps.
It's interesting to run Game of Life on the torus . The right and left edges are glued together, and the top and bottom edges are glued together . So the glider moves out of the area at the bottom and back in at the top.
Before recalculating the iteration, however, the edges must be filled with the values resulting from pasting them together.
      /**
     * Take one step.
     */
    public void run (boolean torus)
    {
        if (torus)
        {
            field[0][0] = field[n][m];
            field[0][m + 1] = field[n][1];
            field[n + 1][0] = field[1][m];
            field[n + 1][m + 1] = field[1][1];
            for (int i = 1; i <= n; i++)
            {
                field[i][0] = field[i][m];
                field[i][m + 1] = field[i][1];
            }
            for (int j = 1; j <= m; j++)
            {
                field[0][j] = field[n][j];
                field[n + 1][j] = field[1][j];
            }
        }

        for (int i = 1; i <= n; i++)
            for (int j = 1; j <= m; j++)
            {
                // Counting neighbors:
                int neighbors = 0;
                if (field[i + 1][j]) neighbors++;
                if (field[i][j + 1]) neighbors++;
                if (field[i - 1][j]) neighbors++;
                if (field[i][j - 1]) neighbors++;
                if (field[i + 1][j + 1]) neighbors++;
                if (field[i + 1][j - 1]) neighbors++;
                if (field[i - 1][j + 1]) neighbors++;
                if (field[i - 1][j - 1]) neighbors++;

                // Set a new field according to the rules:
                if (field[i][j])
                    work[i][j] = neighbors == 2 || neighbors == 3;
                else
                    work[i][j] = neighbors == 3;
            }

        // Copy workspace back and count the living:
        count = 0;
        for (int i = 1; i <= n; i++)
            for (int j = 1; j <= m; j++)
            {
                field[i][j] = work[i][j];
                if (field[i][j]) count++;
            }
    }
If the glider is moved in a 5x6 grid, it will be in exactly the same place after 120 steps.
    public static void main (String args[])
    {
        Situation situation = new Situation(5, 6);
        situation.set(glider, 1, 1);
        System.out.println(situation);
        for (int i = 0; i < 120; i++)
            situation.run(true);
        System.out.println(situation);
    }
If the same process is performed on a flat playing field, a stable block is created after 11 iterations.
-X----
--X---
XXX---
------
------


------
------
------
---XX-
---XX-
An interesting question is when the situation repeats itself . Determining when this happens is time-consuming, as it involves comparing the current version with all the previous versions that also need to be saved.
We use hashtables. For this, the situations are compressed into bits of integers so they can be compared faster and take up less space. Hashtables store files under a key. The keys simply need to be comparable using `equals()` . We use the stored bits as the key—that is, the data itself. We write the ` equals() ` function ourselves. Every object has this function. By default, the addresses in memory would simply be compared.
Hashtables also require an integer code, which should ideally be generated from the key in a broadly distributed manner. However, it must always be the same code for the same data. We generate this code from the bits by concatenating the integers using an exclusive OR operator. To do this, we override the `hashCode()` method , which every object also possesses.
package rene.life;

/**
 * Stores the situation in bits of integers. It uses equals() and hashCode().
 * overwritten.
 */
public class HashedSituation
{
    int[] bits;
    int iteration;

    public HashedSituation (int[] bits, int iteration)
    {
        this.bits = bits;
        this.iteration = iteration;
    }

    @Override
    public int hashCode()
    {
        int code = 0;
        for (int i = 0; i < bits.length; i++)
            code = code ^ bits[i];
        return code;
    }

    @Override
    public boolean equals (Object o)
    {
        HashedSituation other = (HashedSituation) o;
        for (int i = 0; i < bits.length; i++)
            if (bits[i] != other.bits[i]) return false;
        return true;
    }
}
The following function in the `Situation` class creates the integer array containing the bits. We also add a function that can reverse the process, creating situations from bit arrays. This is essential for testing purposes.
    /**
     * Reads the boolean fields into an array of integers as bits.
     *
     * @return
     */
    public int[] getBits ()
    {
        int size = (n * m) / 32 + 1;
        int bits[] = new int[size];
        int current = 0;
        int work = 0;
        int currentbit = 0;

        for (int i = 1; i <= n; i++)
            for (int j = 1; j <= m; j++)
            {
                work = work << 1;
                if (field[i][j]) work = work | 1;
                currentbit++;
                if (currentbit == 32)
                {
                    bits[current++] = work;
                    currentbit = 0;
                    work = 0;
                }
            }
        if (currentbit > 0)
        {
            work = work << (32 - currentbit);
            bits[current] = work;
        }

        return bits;
    }

   /**
    * Inverse of getBits()
    */
    public void fromBits (int[] bits)
    {
        clear();

        int current = 0;
        int currentbit = 0;
        int work = bits[current];

        for (int i = 1; i <= n; i++)
            for (int j = 1; j <= m; j++)
            {
                if (((work >> (31 - currentbit)) & 1) != 0)
                    field[i][j] = true;
                currentbit++;
                if (currentbit == 32)
                {
                    current++;
                    currentbit = 0;
                    work = bits[current];
                }
            }
    }
Finally, we write functions in `main` that execute the experiment and create a file containing the first repetitions found. The current state is repeatedly populated with the chosen density and then allowed to run until the first repetition occurs. We always use the same hashtable, but clear it after each repetition. The results are stored in a file so we can analyze them with a statistical program.
     static Hashtable<HashedSituation, HashedSituation> table = //
            new Hashtable<HashedSituation, HashedSituation>(300);

    public static int firstRepetition (Situation situation)
    {
        int iteration = 0;

        table.clear();

        int[] bits = situation.getBits();
        HashedSituation hashed = new HashedSituation(bits, iteration);
        table.put(hashed, hashed);

        while (true)
        {
            situation.run(true);
            bits = situation.getBits();
            iteration++;
            hashed = new HashedSituation(bits, iteration);
            if (table.contains(hashed)) return iteration;
            table.put(hashed, hashed);
            if (iteration > 1000) break;
        }

        return iteration;
    }

    public static void generateRepeitionStatistics(Situation situation,
            double density, int times)
    {
        try
        {
            File file = new File(
                    System.getProperty("user.home")
                            + System.getProperty("file.separator")
                            + "repetitions.dat");
            PrintWriter out = new PrintWriter(file);

            for (int i = 0; i < times; i++)
            {
                situation.fillRandom(density);
                out.println(firstRepetition(situation));
            }

            out.close();

            System.out
                    .println("Densities written to " + file.getAbsolutePath());
        }
        catch (Exception e)
        {
            System.out.println(e);
        }

    }
All of this is, of course, not so easy to implement and understand. Therefore, one should either avoid conducting such experiments initially or use a simpler, but significantly less effective, method for detecting repetitions.
Here are statistics on the first few repetitions in a 20x20 torus grid that is 50% filled. The average is approximately 200.

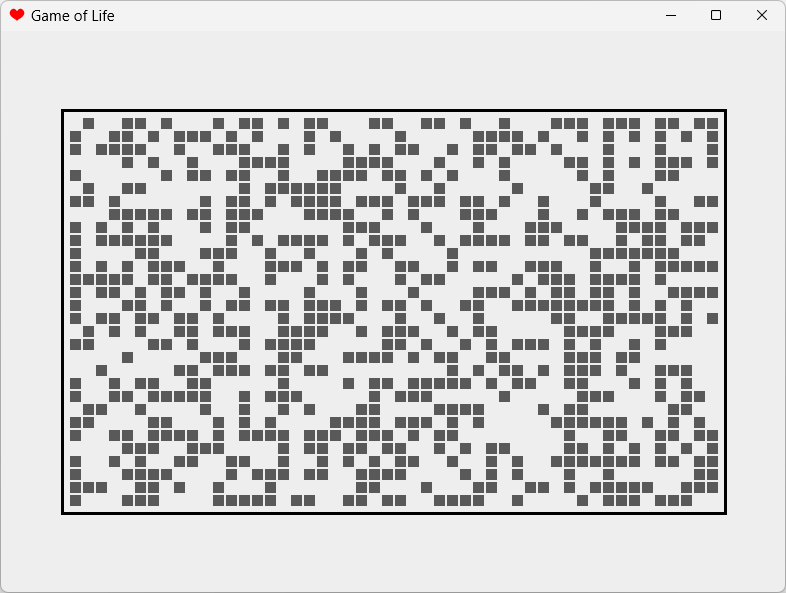
Of course, Game of Life is most fun when you animate the iterations. Therefore, we'll first program a simple panel that can represent a situation.
One problem is that we've previously understood the situations in terms of coordinates (row, column). Console output was also row-by-row. However, Java's graphics use (column, width). You have to be a little careful when drawing if you want to retain this old understanding. Of course, the graphics are buffered twice since we want to animate them.
We'll start with a 50% fill so we can see something right away.
package rene.life;

import java.awt.BasicStroke;
import java.awt.Color;
import java.awt.Graphics;
import java.awt.Graphics2D;

import javax.swing.JPanel;

public class SituationPanel extends JPanel
{

    MainFrame main;
    Situation;
    int width, height;
    int fieldwidth;

    Color colorrectangle = Color.black;
    Color colorfield = Color.gray.darker();
    Color colorback = Color.white;

    public SituationPanel (MainFrame main, Situation situation)
    {
        this.main = main;
        this.situation = situation;

        situation.fillRandom(0.5);

        setDoubleBuffered(true);
    }

    @Override
    public void paint (Graphics graphics)
    {
        Graphics2D g = (Graphics2D) graphics;

        width = getWidth();
        height = getHeight();
        g.setColor(colorback);
        g.fillRect(0,0,widht,height);

        fieldwidth = width / Math.max(situation.m + 10, situation.n + 10);

        int upperx = width / 2 - situation.m * fieldwidth / 2;
        int uppery = height / 2 - situation.n * fieldwidth / 2;

        g.setStroke(new BasicStroke(3));
        g.setColor(colorrectangle);
        g.drawRect(upperx - fieldwidth / 2,
                uppery - fieldwidth / 2,
                situation.m * fieldwidth + fieldwidth,
                situation.n * fieldwidth + fieldwidth);

        g.setColor(colorfield);

        for (int i = 1; i <= situation.n; i++)
            for (int j = 1; j <= situation.m; j++)
            {
                if (situation.field[i][j])
                {
                    g.fillRect(upperx + (j - 1) * fieldwidth + 2,
                            uppery + (i - 1) * fieldwidth + 2, fieldwidth - 2,
                            fieldwidth - 2);
                }
            }
    }

}
The panel is embedded in a window using the techniques already presented; this window is simply created in the main program. The window handles its own display and terminates the program when it is closed.
package rene.life;

import javax.swing.ImageIcon;
import javax.swing.JFrame;

public class MainFrame extends JFrame
{

    Situation;
    SituationPanel panel;

    public MainFrame()
    {
        super("Game of Life");
        setIconImage(new ImageIcon(
                getClass().getResource("hearts32.png")).getImage());
        setDefaultCloseOperation(JFrame.EXIT_ON_CLOSE);

        situation = new Situation(30, 50);
        panel = new SituationPanel(this, situation);
        add("Center", panel);

        setSize(800, 600);
        setLocationRelativeTo(null);

        setVisible(true);
    }
}
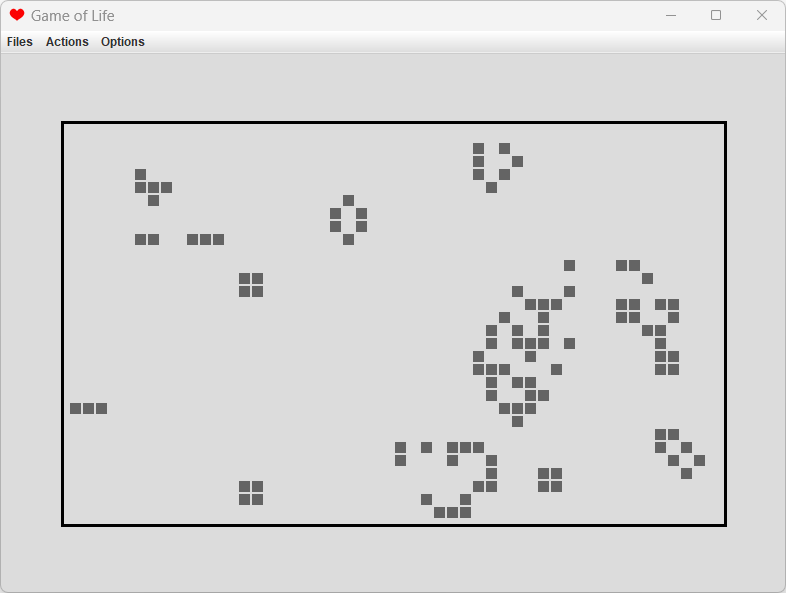
As a next step, we'll allow the user to perform individual iteration steps . For this, we'll use a menu item with keyboard shortcuts. We'll also create a Files menu, where we'll later have entries for saving and loading, as well as an Options menu that can turn the torus on and off.
We use custom functions to generate menu items and achieve shorter, more readable code. These functions add the frame as an ActionListener to the menu item and set the keyboard shortcut.
package rene.life;

import java.awt.event.ActionEvent;
import java.awt.event.ActionListener;
import java.awt.event.KeyEvent;

import javax.swing.ImageIcon;
import javax.swing.JCheckBoxMenuItem;
import javax.swing.JFrame;
import javax.swing.JMenu;
import javax.swing.JMenuBar;
import javax.swing.JMenuItem;
import javax.swing.KeyStroke;

public class MainFrame extends JFrame implements ActionListener
{

    Situation;
    SituationPanel panel;

    JMenuItem itemexit, itemstep;
    JCheckBoxMenuItem checktorus;

    public MainFrame()
    {
        super("Game of Life");
        setIconImage(new ImageIcon(
                getClass().getResource("hearts32.png")).getImage());
        setDefaultCloseOperation(JFrame.EXIT_ON_CLOSE);

        JMenuBar menubar = new JMenuBar();
        setJMenuBar(menubar);

        JMenu files = new JMenu("Files");
        menubar.add(files);
        itemexit = additem(files, "Exit",
                KeyStroke.getKeyStroke(KeyEvent.VK_X, KeyEvent.CTRL_DOWN_MASK));

        JMenu actions = new JMenu("Actions");
        menubar.add(actions);
        itemstep = additem(actions, "One Step",
                KeyStroke.getKeyStroke(KeyEvent.VK_G, KeyEvent.CTRL_DOWN_MASK));

        JMenu options = new JMenu("Options");
        menubar.add(options);
        checktorus = addcheckboxitem(options, "Torus",
                KeyStroke.getKeyStroke(KeyEvent.VK_T, KeyEvent.ALT_DOWN_MASK));
        checktorus.setState(true);

        situation = new Situation(30, 50);
        panel = new SituationPanel(this, situation);
        add("Center", panel);

        setSize(800, 600);
        setLocationRelativeTo(null);

        setVisible(true);
    }

    public JMenuItem additem (JMenu menu, String text, KeyStroke key)
    {
        JMenuItem item = new JMenuItem(text);
        item.addActionListener(this);
        if (key != null) item.setAccelerator(key);
        menu.add(item);
        return item;
    }

    public JCheckBoxMenuItem addcheckboxitem (JMenu menu, String text,
            KeyStroke key)
    {
        JCheckBoxMenuItem item = new JCheckBoxMenuItem(text);
        item.addActionListener(this);
        if (key != null) item.setAccelerator(key);
        menu.add(item);
        return item;
    }

    @Override
    public void actionPerformed (ActionEvent e)
    {
        if (e.getSource() == itemexit)
        {
            dispose();
            System.exit(0);
        }

        else if (e.getSource() == itemstep)
        {
            situation.run(checktorus.getState());
            repaint();
        }

        else if (e.getSource() == checktorus)
        {
            System.out.println("Here");
            repaint();
        }
    }

}
The next step is animating the iterations. The user should be able to start and stop the animation via a menu item or a keyboard shortcut. The animation has a fixed delay in milliseconds between generations, which we will increase and decrease using the left and right keyboard. During the animation, there should be feedback in the display, even when nothing is moving. To achieve this, we will slightly darken the background.
The following class contains everything necessary. It can start the animation and can be queried to see if the animation is still running. We simply make the thread public so that anyone can interrupt it.
package rene.life;

public class Animation implements Runnable
{

    MainFrame main;
    SituationPanel panel;

    // Delay in milliseconds
    public int delay = 200;

    // The running thread
    public Thread thread;

    public Animation (MainFrame main, SituationPanel panel)
    {
        this.main = main;
        this.panel = panel;
    }

    public void start()
    {
        thread = new Thread(this);
        thread.start();
    }

    public boolean isAlive ()
    {
        return thread != null && thread.isAlive();
    }

    @Override
    public void run()
    {
        while (!thread.isInterrupted())
        {
            try
            {
                Thread.sleep(delay);
            }
            catch (InterruptedException e)
            {
                break;
            }
            panel.situation.run(main.checktorus.getState());
            panel.repaint();
        }
    }

}
In the main program, a menu item for animation is added and handled as follows.
        else if (e.getSource() == itemrun)
        {
            if (animation.isAlive())
                animation.thread.interrupt();
            else
                animation.start();
        }
The background drawing is slightly modified, with animatedback being a light gray, which we obtain using new Color(220,220,220) .
         g.setColor(main.animation.isAlive() ? animatedback : colorback);
        g.fillRect(0, 0, width, height);
To change the speed, we could implement a KeyboardListener . Using a KeyAdapter, we would then insert the following lines into the constructor of MainFrame .
        addKeyListener(new KeyAdapter()
        {
            @Override
            public void keyPressed (KeyEvent e)
            {
                int key = e.getKeyCode();
                switch (key)
                {
                    case KeyEvent.VK_RIGHT:
                        animation.delay /= 2;
                        break;
                    case KeyEvent.VK_LEFT:
                        animation.delay *= 2;
                        break;
                }
            }
        });
The disadvantage is that the user cannot look up the keyboard commands in the menu. Therefore, it might be better to use menu entries.
         itemfaster = additem(actions, "Faster",
                KeyStroke.getKeyStroke(KeyEvent.VK_RIGHT, 0));
        itemslower = additem(actions, "Slower",
                KeyStroke.getKeyStroke(KeyEvent.VK_LEFT, 0));
While user interface guidelines don't explicitly prohibit including simple keyboard commands in menus, it's considered bad practice. Therefore, in the final code, you'll need to use Ctrl+Right and Ctrl+Left.
The program is now running quite well. After just a few iterations, a stable density develops, and often a stable state is reached soon after.
First, we'd like an entry in Actions that allows users to populate the field with a density of their choosing . To do this, we open one of Java's default dialogs that accept user input. The event handler then looks like this.
        if (e.getSource() == itemfill)
        {
            if (animation.isAlive())
                animation.thread.interrupt();
            String s = JOptionPane.showInputDialog(this,
                    "Set Fill Density", "0.5");
            if (s != null)
            {
                try
                {
                    double x = Double.parseDouble(s);
                    x = Math.max(Math.min(0.99, x), 0.01);
                    situation.fillRandom(x);
                }
                catch (Exception ex)
                {
                    JOptionPane.showMessageDialog(this, "Illegal number!");
                }
            }
            panel.repaint();
        }
The next step would be to activate or deactivate individual fields using the mouse. For this, we use a MouseMotionListener for mouse movements over the area and a MouseListener for clicks. Mouse movements are only processed, of course, when the animation is not running.
Note that mouse actions should be received in the panel. The complete panel now looks like this.
package rene.life;
import java.awt.BasicStroke;
import java.awt.Color;
import java.awt.Graphics;
import java.awt.Graphics2D;
import java.awt.event.MouseAdapter;
import java.awt.event.MouseEvent;
import java.awt.event.MouseMotionAdapter;
import javax.swing.JPanel;
/**
 * Contains a depiction of a situation in the Game of Life.
 */
public class SituationPanel extends JPanel
{
    // Included in:
    MainFrame main;
    // Situation depicted:
    Situation;
     // Panel size:
     int width, height;
     // Top left corner of the fields
     int upperx, uppery;
     // Width of a field
     int fieldwidth;
     // Should a field be highlighted?
     boolean highlighted;
     // Highlighted field
     int ihighlight, jhighlight;
    // Different colors for fields, background and highlighting.
    Color colorrectangle = Color.black;
    Color colorfield = new Color(100, 100, 100);
    Color colorback = Color.white;
    Color animatedback = new Color(220, 220, 220);
    Color colorfieldhighlight = new Color(120, 50, 50);
    Color colorhighlight = new Color(220, 160, 160);
    /**
     * Initialization with density 0.5. Setting the listeners for the mouse.
     *
     * @param main
     * @param situation
     */
    public SituationPanel (MainFrame main, Situation situation)
    {
        this.main = main;
        this.situation = situation;
highlighted = false;
situation.fillRandom(0.5);
        addMouseListener(new MouseAdapter()
        {
            @Override
            public void mouseClicked (MouseEvent e)
            {
                if (main.animation.isAlive())
                {
                    main.animation.thread.interrupt();
                    repaint();
                }
                else
                    mouseclicked(e.getX(), e.getY());
            }
        });
        addMouseMotionListener(new MouseMotionAdapter()
        {
            @Override
            public void mouseMoved (MouseEvent e)
            {
                if (main.animation.isAlive()) return;
                mousemoved(e.getX(), e.getY());
            }
        });
        setDoubleBuffered(true);
    }
    @Override
    public void paint (Graphics graphics)
    {
        Graphics2D g = (Graphics2D) graphics;
        width = getWidth();
        height = getHeight();
         // Clear background:
         g.setColor(main.animation.isAlive() ? animatedback : colorback);
        g.fillRect(0, 0, width, height);
         // Calculate the field size so that the field fits into the panel.
         fieldwidth = width / Math.max(situation.m + 10, situation.n + 10);
         // Calculation of the upper left corner of the representation
         upperx = width / 2 - situation.m * fieldwidth / 2;
        uppery = height / 2 - situation.n * fieldwidth / 2;
         // Draw a rectangle around the fields
         g.setStroke(new BasicStroke(3));
        g.setColor(colorrectangle);
        g.drawRect(upperx - fieldwidth / 2,
                uppery - fieldwidth / 2,
                situation.m * fieldwidth + fieldwidth,
                situation.n * fieldwidth + fieldwidth);
// Draw fields
g.setColor(colorfield);
        for (int i = 1; i <= situation.n; i++)
            for (int j = 1; j <= situation.m; j++)
            {
                boolean highlight = (highlighted && i == ihighlight
                        && j == jhighlight);
                if (situation.field[i][j])
                // Occupied field
                 {
                    if (highlight) g.setColor(colorfieldhighlight);
                    g.fillRect(upperx + (j - 1) * fieldwidth + 2,
                            uppery + (i - 1) * fieldwidth + 2, fieldwidth - 2,
                            fieldwidth - 2);
                    if (highlight) g.setColor(colorfield);
                }
                else if (highlight)
                // Empty but highlighted field
                 {
                    g.setColor(colorhighlight);
                    g.fillRect(upperx + (j - 1) * fieldwidth + 2,
                            uppery + (i - 1) * fieldwidth + 2, fieldwidth - 2,
                            fieldwidth - 2);
                    if (highlight) g.setColor(colorfield);
                }
            }
    }
    /**
     * The user clicked at location x,y
     *
     * @param x
     * @param y
     */
    public void mouseclicked (int x, int y)
    {
        int i = (y - uppery) / fieldwidth + 1;
        int j = (x - upperx) / fieldwidth + 1;
         // Within the range?
         if (i < 1 || i > situation.n || j < 1 || j > situation.m) return;
         situation.field[i][j] = !situation.field[i][j];
        repaint();
    }
    /**
     * The user moved the mouse over the panel.
     *
     * @param x
     * @param y
     */
    public void mousemoved (int x, int y)
    {
        int i = (y - uppery) / fieldwidth + 1;
        int j = (x - upperx) / fieldwidth + 1;
         // Within the range?
         if (i < 1 || i > situation.n || j < 1 || j > situation.m)
            highlighted = false;
        else
        // yes:
         {
            highlighted = true;
            ihighlight = i;
            jhighlight = j;
        }
        repaint();
    }
}
It's also interesting to be able to change the width and height of the field. You could use the simple dialog for entering a single line. The user would then have to enter the two values there. A custom dialog is more professional. We'll create a new class for this dialog.
package rene.life;
import java.awt.FlowLayout;
import java.awt.GridLayout;
import java.awt.TextField;
import java.awt.event.ActionEvent;
import java.awt.event.ActionListener;
import javax.swing.JButton;
import javax.swing.JDialog;
import javax.swing.JLabel;
import javax.swing.JPanel;
import javax.swing.border.EmptyBorder;
/**
 * Input dialog for width and height of the field.
 */
public class SizeInput extends JDialog implements ActionListener
{
    TextField fieldwidth, fieldheight;
    JButton buttonok, buttoncancel;
boolean okay;
    public SizeInput (MainFrame main)
    {
        super(main, "Enter Field Size", true);
okay = false;
        JPanel north = new JPanel();
        north.setLayout(new FlowLayout());
        north.add(new JLabel("Enter width and height between 5 and 200"));
        add("North", north);
        JPanel center = new JPanel();
        center.setLayout(new GridLayout(2, 2));
        center.setBorder(new EmptyBorder(10, 10, 10, 10));
        center.add(new JLabel("Width"));
        center.add(fieldwidth = new TextField("" + main.situation.m));
        center.add(new JLabel("Height"));
        center.add(fieldheight = new TextField("" + main.situation.n));
add("Center", center);
        JPanel south = new JPanel();
        south.setLayout(new FlowLayout());
        south.add(buttonok = new JButton("OK"));
        buttonok.addActionListener(this);
        south.add(buttoncancel = new JButton("Cancel"));
        buttoncancel.addActionListener(this);
add("South", south);
        pack();
    }
    @Override
    public void actionPerformed (ActionEvent e)
    {
        if (e.getSource() == buttonok)
        {
            okay = true;
            dispose();
        }
        else if (e.getSource() == buttoncancel)
        {
            dispose();
        }
    }
}

Another goal was to be able to save and load the situations . For this, we use the FileSelector provided by Java. The files are formatted as lines like "X---XXX---XX".
The corresponding code for the event handlers is as follows. Note that when reading the file, all lines are cached first. They must all be the same length. Lines without an "X" or "-" at the beginning are ignored. Only then is the size of the situation known.
        else if (e.getSource() == itemsave)
        {
            filechooser.setFileFilter(
                    new FileNameExtensionFilter("Data Files", "dat"));
            if (filechooser
                    .showSaveDialog(filechooser) == JFileChooser.APPROVE_OPTION)
            {
                File file = filechooser.getSelectedFile();
                try
                {
                    if (!file.getName().toLowerCase().endsWith(".dat"))
                    {
                        file = new File(file.getAbsolutePath() + ".dat");
                    }
PrintWriter out = new PrintWriter(file);
                    for (int i = 1; i <= situation.n; i++)
                    {
                        String s = "";
                        for (int j = 1; j <= situation.m; j++)
                            if (situation.field[i][j])
                                s = s + "X";
                            else
                                s = s + "-";
                        out.println(s);
                    }
                    out.close();
                }
                catch (Exception e1)
                {
                    JOptionPane.showMessageDialog(this,
                            "Error with file\n" + file.getAbsolutePath(),
                            "Message", JOptionPane.INFORMATION_MESSAGE);
                }
            }
        }
        else if (e.getSource() == itemload)
        {
            filechooser.setFileFilter(
                    new FileNameExtensionFilter("Data Files", "dat"));
            if (filechooser
                    .showOpenDialog(filechooser) == JFileChooser.APPROVE_OPTION)
            {
                File file = filechooser.getSelectedFile();
                try
                {
                    BufferedReader in = new BufferedReader(
                            new FileReader(file));
Vector<String> lines = new Vector<String>();
int width = 0;
                    while (true)
                    {
                        String line = in.readLine();
                        if (line == null) break;
                        if (!line.startsWith("X") && !line.startsWith("-"))
                            continue;
                        if (width == 0)
                            width = line.length();
                        else if (width != line.length())
                        {
                            in.close();
                            throw new Exception();
                        }
                        lines.add(line);
                    }
in.close();
int height = lines.size();
situation = new Situation(height, width);
int i = 0;
                    for (String line : lines)
                    {
                        for (int j = 0; j < width; j++)
                        {
                            situation.field[i][j] = line.charAt(j) == 'X';
                        }
                        i++;
                    }
                    panel.situation = situation;
                    panel.repaint();
                }
                catch (Exception e1)
                {
                    JOptionPane.showMessageDialog(this,
                            "Error with file\n" + file.getAbsolutePath(),
                            "Message", JOptionPane.INFORMATION_MESSAGE);
                }
            }
        }
Finally, we'll write a dialog that displays HTML text as help .
package rene.life;
import java.awt.GridLayout;
import java.io.IOException;
import java.net.URL;
import javax.swing.JEditorPane;
import javax.swing.JFrame;
import javax.swing.JPanel;
import javax.swing.JScrollPane;
import javax.swing.event.HyperlinkEvent;
import javax.swing.event.HyperlinkListener;
public class Help extends JFrame
{
    public Help()
    {
        super("Help");
        setIconImage(new javax.swing.ImageIcon(
                getClass().getResource("hearts32.png")).getImage());
        JPanel panel = new JPanel();
        panel.setLayout(new GridLayout(1, 1));
        JEditorPane jEditorPane = new JEditorPane();
        jEditorPane.setEditable(false);
        URL url = Help.class.getResource("index.html");
        jEditorPane.putClientProperty(JEditorPane.HONOR_DISPLAY_PROPERTIES,
                Boolean.TRUE);
        try
        {
            jEditorPane.setPage(url);
        }
        catch (IOException e)
        {
            jEditorPane.setContentType("text/html");
            jEditorPane.setText("<html>Page not found.</html>");
        }
        JScrollPane jScrollPane = new JScrollPane(jEditorPane);
        panel.add(jScrollPane);
add(panel);
        setSize(800, 800);
        setLocationRelativeTo(null);
revalidate();
        jEditorPane.addHyperlinkListener(new HyperlinkListener()
        {
            @Override
            public void hyperlinkUpdate (HyperlinkEvent e)
            {
                if (e.getEventType() == HyperlinkEvent.EventType.ACTIVATED)
                {
                    // System.out.println(e.getDescription());
                    try
                    {
                        java.awt.Desktop.getDesktop().browse(
                                java.net.URI.create(e.getDescription()));
                    }
                    catch (IOException e1)
                    {
                    }
                }
            }
        });
        setVisible(true);
    }
}
The file index.html must be located in the directory of the help class. The help documentation, like the program itself, is written in English. Local versions can be created in Java.
<h1>Help for Conway's Game of Life</h1>
<p>This program is part of my Java class (in German) at <a href="http://java.renegrothmann.de/">my homepage</a>.
	It is explained in all details in that class.</p>
Rene Grothmann
<h1>Rules for Conway's Game of Life</h1>
<p>
	The Game of Life consists of a matrix of cells which can be dead or alive.
	The matrix has either boundaries, or the left and right edge and the upper and lower
	edges are glued together to form a torus (donat shaped object).
</p>
<ul>
	<li>
		An empty cell becomes alive if it has exactly 3 neighbors.
	</li>
	<li>
		A living cell only survives if it has 2 or 3 neighbors.
	</li>
</ul>
<p>
	Neighbors here are the 8 neighboring cells on the torus, respectively 8 or fewer cells
	for matrix with boundaries.
</p>
<p>
	In each generation, all cells are set dead or alive according to these rules.
</p>
<h1>The Program</h1>
<p>
	This program can simulate the generations. A starting position can be set by chance
	with a selected density, or using the mouse.
</p>
<p>
	The default start position is filled with 50% cells alive randomly. Another density
	can be selected in the menu, as well as another matrix size. By clicking with the mouse,
	cells can be toggled from life to death.
</p>
<p>
	An animation can be started in the menu. The animation can be sped up or slowed down.
</p>
Finally, the project will be internationalized. For this purpose, a ResourceBundle will be loaded in Main , whose strings can be translated by all classes using the static method Main.translate() .
public class Main
{
    static ResourceBundle B; // bundle used

    public static void initBundle()
    // Initialize B
    {
        try
        {
            B = ResourceBundle.getBundle("GOL");
        }
        catch (Exception e)
        {
            B = null;
        }
    }

    public static String translate (String name)
    {
        try
        {
            return B.getString(name);
        }
        catch (Exception e)
        {
            return name;
        }
    }

    public static void main (String args[])
    {
        initBundle();
        new MainFrame();
    }
}
If no translation exists, the original name is used. The German translation in GOL.de.properties looks like this.
helpfile=index_de.html

Files=Files
Save to File
Load from File
Fill Situation = Filling a situation with density
Clear Situation = Delete Situation
Set\ Size=Change size
Exit = Exit
Actions
One Step
Animation = Animation
Faster = Faster
Slower
Options=Options
Torus = On the torus
Help = Help

Set\ Fill\ Density=Dichte?
Illegal number! = Incorrect number entry!

Enter\ Field\ Size=Size?
Width=Width
Height = Height
fieldsize = width and height between 5 and 200

OK=OK
Cancel = Abort
The file GOL.properties contains only two "translations", the name of the help file and a string that appears too long to be used as a key.
helpfile=index.html
fieldsize=Enter width and height between 5 and 200
Of course, you now also have to translate index.html and save it as index_de.html .
A complex program is never truly finished. There are always bugs or things that were simply overlooked. One shouldn't hesitate to revise the program and replace the affected sections for the user. However, this doesn't mean that incomplete, buggy, or simply poorly tested programs should be delivered as the final product. Nevertheless, providing customers with preliminary versions for testing is a characteristic of rapid development .
Of course, any bugs that need fixing should be fixed immediately. Unfortunately, programs are often simply developed further after release. If bugs are discovered during this process, they should be fixed in the released version, not in the new, untested version.
The program developed here is available for download as a JAR file, including the source code . You can extract this file using an unzip utility to access the source code.